Friday, June 26, 2015

Piano Make Over


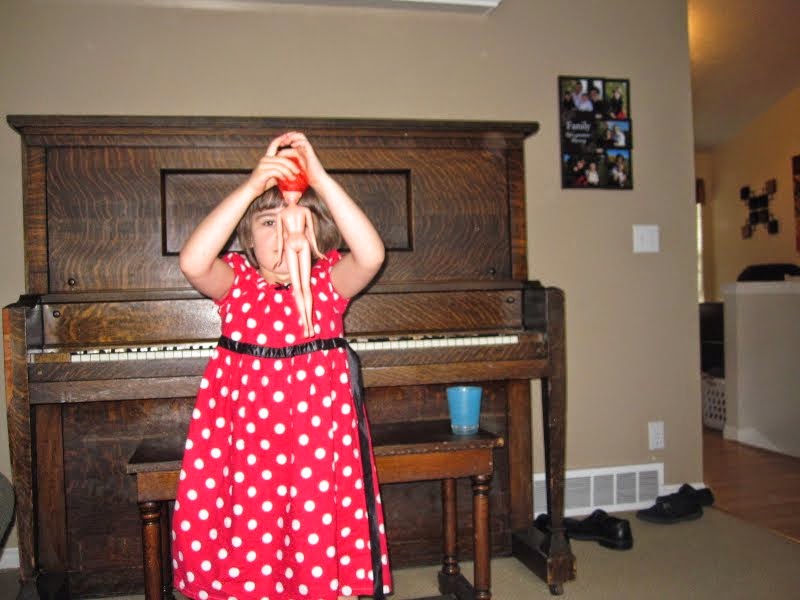
This is the best before picture I could fine. Notice the scratch where the piano bench hits the piano. Notice the huge chip in the veneer on the left post. There was also a hole where Jordan liked to hide things in the piano using that hole. You can't see the hole in the picture. It is behind Lizzy just above the pedals. The poor piano bench had been through a lot, too. 

In the following picture you can see the finished piano bench. It was my first time upholstering anything. The gorgeous fabric is so stunning that my mistakes are easily overlooked, I think. =) It was my painting test run. Turned out great. So the whole piano would be next. 


The entire piano had so many decades of varnish applied that there were some strange texture issues on all visible surfaces. This required more than just a re-paint - it needed a start over. So the whole thing got sanded. Thanks again, Mom, for the sander.  


I thought it would lighten the load by taking all the removable parts out of the piano. It didn't help very much. It was still a beast to move. The harp attached to the inside is the super heavy part. But I'm glad I unassembled it because I was able to clean up years of dust under the keys. 


I considered using stain to preserve the unique looking grain. For several reasons I decided to go with Rustoleum's cabinet makeover kit. The bare wood needed a layer of primer before paint. I thought it would be funny to have a sky blue piano for a day. 


After primer came 2 coats of "bond coat" in expresso brown. 


Next I used diluted red paint and a cloth to give the piano red streaks to make it look like a deep cherry wood. The next step was glaze which gave the paint a gorgeous deep look and even brought out the red. Finished with a clear protective top coat. If you look closely at the following picture you can see the red.  


Actually you can disregard the white flaws on the front of the piano. That happened while moving it in. I've since fixed them. I plan on painting and applying a pretty wood scroll over the rectangle. Will happen as soon as I get to home depot. 


Friday, June 12, 2015

Hard Knock Life

I'm making the kids clean their rooms. Lizzy is now singing "It's a hard knock life for us."

Wednesday, April 15, 2015

Shower scrub

Riverton has super hard water. And I've tried to scrub the soap scum off of the shower many times. Yet things were getting so bad that something drastic needed to happen. 


Before: textured hard water marks and soap scum where you should be seeing light reflecting. 


After drastic measures: Just the one tile: You can actually see a reflection of our bathroom in this one tile!


It would take HOURS to get the tile to shine like that. So this is what I did instead: 


Still took hours to clean the whole shower since the scum was so bad. But now it's shiny and you can see reflections through every tile. =) Woo-hoo! Yay for power tools! 

Clean Kitchen

I LOVE LOVE LOVE when the kitchen counter all cleaned off. If I want to keep it this way I must actively work on it at least a couple times a day. This is our "hot spot" that attracts clutter. Clutter clutter go away. 


When we first saw this house I thought the sink in the middle of kitchen was strange. But now I really like it this way!

Extended stairs

The stairs going from the kitchen into the garage have always felt very steep. The top stair has also chipped off too much for my liking. So I finally worked on extending the stairs. Woo hoo! I was able to use exclusively materials on hand so I didn't have to spend a penny. 


Piano bench

Piano bench before: 


Piano bench after: 


Next up: PIANO! 

Greetings


Jordan:  (Jordan opens the front door and yells to the passing kids) "HI!"

Me: Jordan! Get back in here! You can't say hi to kids when you don't have pants on!


Although I must admit his batman underwear are very cute. =)